

Ceramic Tile | Set of 10
Couldn't load pickup availability
A minimum of 10 tiles must be ordered.
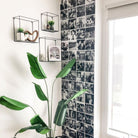
Photos printed on Ceramic Tiles for your walls!
A guide on how to install ceramic tiles and apply sealant is below.
How to Install Ceramic Tiles on a Wall
1. Gather Your Tools and Materials
Before you begin, make sure you have all the necessary items. You'll need:
-
Ceramic tiles
-
Tile adhesive & Tile Grout
-
Tile Spacers (optional)
-
Measuring tape & Pencil
-
Bucket and sponge for cleanup
- Tile and Cement Sealer
2. Prepare the Wall Surface
Ensure the wall is clean, dry, and flat. Remove any old wallpaper, paint, or grease. Fill any cracks or holes with patching compound and sand it smooth. For best results, use a primer to prepare the surface for better adhesion.
3. Plan Your Layout
Measure the wall and determine the center point. From this center point, draw a vertical and horizontal line with a level. This will be your starting point and will help ensure the tiles are straight and centered.
4. Apply the Adhesive
Using a notched trowel, spread a thin, even layer of tile adhesive on a small section of the wall, starting from your center point. Hold the trowel at a 45-degree angle to create ridges in the adhesive. This ensures good contact between the tile and the wall.
5. Lay the Tiles
Press the first tile firmly into the adhesive, giving it a slight twist to set it in place. Use tile spacers to maintain a consistent gap between each tile. Continue to lay the tiles, working outwards from your center point. Use a level frequently to check that your tiles are aligned both horizontally and vertically.
6. Clean Up and Let it Cure
Once all the tiles are in place, remove the tile spacers. Use a damp sponge to wipe away any excess adhesive from the tile surfaces. Allow the adhesive to dry completely according to the manufacturer's instructions, which is typically 24-48 hours.
How to Grout and Seal the Tiles
After the adhesive has cured, it's time to grout and seal the tiles.
1. Apply the Grout
Mix the grout according to the package directions. Use a grout float to spread the grout over the tile joints, pressing it firmly into the gaps. Work in small sections, wiping away excess grout from the tile faces as you go.
2. Clean the Grout Haze
After the grout has started to set (usually 15-30 minutes), use a clean, damp sponge to wipe the tile surface diagonally across the grout lines. This removes the "grout haze" and smooths the grout lines.
3. Seal the Grout
Once the grout is completely dry (check the package for the recommended time, usually 48-72 hours), you can apply a sealant. Use a grout sealer applicator or a small brush to apply the sealant directly to the grout lines. Be careful not to get the sealant on the tile faces.
4. Apply Sealant to the Tiles (Recommended )
Although most ceramic tiles are non-porous and don't need sealing, some may benefit from it, especially in high-moisture areas like a shower. Use a tile and stone sealer and apply it with a clean cloth or sponge, wiping away any excess after a few minutes.
5. Final Touches
Allow the sealant to cure for the recommended time. Your new tiled wall is now ready to use and easy to clean!